Tuesday, September 29, 2015

Joyful Season

Joyful Season is a set in SU's 2015-16 Holiday mini catalog, and so much fun to use.  I am offering this card to all of my wonderful stampers when they come to any of my October 6, 8, or 10, 2015 classes.

The base is Cherry Cobbler cardstock-5 1/2 x 8 1/2, scored at 4 1/4
The next layer of Soft Suede is cut at 5 1/4 x 4
The layer of Very Vanilla cut at 5 x 3 3/4
I used the new Curvy Corner Trio Punch to get the elegant cuts on the top corners of my Very Vanilla piece.  
I used the Project Life corner rounder punch on the Soft Suede layer.
The bird, branch and words were stamped with Soft Suede ink, and the bird over-lay was stamped with Cherry Cobbler.
I colored her beak with a Crushed Curry Marker, and tied it all together with some Cherry Cobbler Seam Binding.

If you would like to place an order, head on over to my Stampin' Up! website,  www.lindafisher.stampinup.net, and click on the "shop now" tab, or click on the 2015-16 Catalog right here on my blog.  

I hold adult classes each month.  If you live near my home at 555 Williamsdale Road, Graham, NC 27253 and would like to attend any of my classes, please let me know.  For details, see my class schedule right here on my blog, or on my SU website found Here.

God is in control, He is able to do more than you can ask or imagine.  Ephesians 3:20 

Thank you for stopping by, and have a great day,

~Linda
Built for Free Using: My Stampin Blog


Built for Free Using: My Stampin Blog

Sunday, September 27, 2015

Guest Designer, Dorriea Murphy and Winter Wishes

Dorriea Murphy, one of my very talented downline, designed this beautiful card and shared it at my bi-monthly shoe-box swap earlier this month.  This is a wonderful set, and so perfect for everyone, especially for the men in our lives, friends, family, or general acquaintances. 

The 5 1/2 x 8 1/2 base is Cherry Cobbler, scored at 4 1/4
The Crumb Cake layer is 5 1/4 x 4
Next is a 2 1/2 x 4 1/2 layer of Cherry Cobbler 
On top of that is a 2 1/4 x 4 1/4 layer of Mossy Meadow
Next is a 2 x 4 layer of Crumb Cake 
The small Mossy Meadow piece for the word base is 3/4 x 2 3/8 and the small Crumb cake piece for the words is 5/8 x 2 1/8

To make this beautiful card I stamped the pine branches all over the large Crumb Cake piece.  Then I covered it with a Versa Mark pad and used Iridescent Ice.  I used my Heat Tool to heat the powder.
After I stamped the sled in Cherry Cobbler, I used dimensionals to to pop up the three layers.

If you would like to place an order, head on over to my Stampin' Up! website,  www.lindafisher.stampinup.net, and click on the "shop now" tab, or click on the 2015-16 Catalog right here on my blog.  
I hold adult classes each month.  If you live near my home at 555 Williamsdale Road, Graham, NC 27253 and would like to attend any of my classes, please let me know.  For details, see my class schedule right here on my blog, or on my SU website found Here.

God is in control, He is able to do more than you can ask or imagine.  Ephesians 3:20 

Thank you for stopping by, and have a great day,

~Linda
Built for Free Using: My Stampin Blog

Thursday, September 24, 2015

Reflection Technique with Lovely as a Tree

I used Lovely as a Tree to make this card and to showcase the reflection technique. Lovely as a Tree that has been in the catalog forever, thankfully, because it is a fantastic "go-to" set for many, many, many occasions.  This is a very easy technique, especially when you use SU's Window sheets.  My Hostess Club ladies will have the chance to make this one at our September 24, 2015 meeting.  

The base is Old Olive card stock-5 1/2 x 8 1/2, scored at 4 1/4
Next is a layer of Whisper White-5 1/4 x 4
Next is a strip of Marina Mist cut at 5 1/4 x 2
The little strip on top of the Marina Mist is Early Espresso and it measures 5 1/4 x 1/2
The background piece for the trees is a 3 3/4" square of Early Espresso
I stamped the trees with Early Espresso ink on a 3 5/8 square piece of Whisper White 
I stamped the words directly on my Whisper White with Early Espresso Ink.
I sponged the middle with Old Olive ink, and used Marina Mist to sponge the reflection.  
I put the tree piece on my card with dimensionals.
I used Crystal Effects on the bottom card, because I wanted the reflection to look like water.

If you would like to place an order, head on over to my Stampin' Up! website,  www.lindafisher.stampinup.net, and click on the "shop now" tab, or click on the 2015-16 Catalog right here on my blog.  

I hold adult classes each month.  If you live near my home at 555 Williamsdale Road, Graham, NC 27253 and would like to attend any of my classes, please let me know.  For details, see my class schedule right here on my blog, or on my SU website found Here.

God is in control, He is able to do more than you can ask or imagine.  Ephesians 3:20 

Thank you for stopping by, and have a great day,

~Linda
Built for Free Using: My Stampin Blog

Tuesday, September 22, 2015

Howl-a-ween Belly Band Card


I'm liking the belly-band cards, I must, because this is second one in made in less than a week.   I have made a video just to show how easy it is to make this super-fun card. You can view it on YouTube by clicking Here,  or click on the Tutorial box right here on my blog. 

Here are the dimensions of each piece of card stock:  
Base of Tangelo Twist is 7 x 4.25, scored at 1.5 on the long side. 
Next layer of Basic Black is 5.25 x 4  
DSP layer is 5 x 3.75  
Basic Black layer for bottom flap is 4 x 1.25, cut 2 of these
DSP layer for the bottom flap is 3.75 x 1, cut 2 of these
Tangelo Twist card stock for the card front is 11 x 3 scored at 3 5/8 x 7 3/8
Whisper White card stock for inside of the card front is 3 3/8 x 2.75 x 3 each 
Tangelo Twist card stock for belly band is  ¾ x about 11, and DSP ½ x about 11

To get the black outline on the skeleton's head, I first stamped and cut out one on Very Vanilla cardstock, trimmed it, then cut out a second in Basic Black and adhered them together.  The wiggle eyes came from my local craft store.

If you would like to place an order, head on over to my Stampin' Up! website,  www.lindafisher.stampinup.net, and click on the "shop now" tab, or click on the 2015-16 Catalog right here on my blog.  

I hold adult classes each month.  If you live near my home at 555 Williamsdale Road, Graham, NC 27253 and would like to attend any of my classes, please let me know.  For details, see my class schedule right here on my blog, or on my SU website found Here.

God is in control, He is able to do more than you can ask or imagine.  Ephesians 3:20 

Thank you for stopping by, and have a great day,

~Linda
Built for Free Using: My Stampin Blog

Sunday, September 20, 2015

Jingle All the Way and Sleigh Ride Edgelit Dies

Stampin' Up! has a wonderful new product in their holiday mini catalog, Sleigh Ride Edgelits Dies, and I just had to use all three in the pack for my card.  My Hostess Club ladies will have the chance to make this one at our September 24, 2015 meeting.  

The base is Old Olive card stock-5 1/2 x 8 1/2, scored at 4 1/4
Next is a layer of Whisper White-5 1/4 x 4
Next is a layer of Night of Navy-5 x 3 3/4
Layer of Old Olive (for tree edgelit) is 5 x 2 1/4
Layer of Cherry Cobbler (for sleigh edgelit) is 5 x 2 1/4
Layer of Whisper White (for houses edgelit) is 5 x 2
I cut the sleigh and horse out a second time with Silver Glimmer paper, and used Tombow glue to adhere it over the Cherry Cobbler.

To get the sparkling background on the Night of Navy (NON), I first stamped it with White Craft ink, using the snowflake stamp in Jingle All the Way.  After the craft ink dried, I used a Versa Mark pad to ink the card stock, and heat embossed with Iridescent Ice. I stamped home for Christmas in NON, and adhered the entire card with snail, versus using dimensionals.  I am pleased as can be with my newest creation, and I hope you will give it a try.

If you would like to place an order, head on over to my Stampin' Up! website,  www.lindafisher.stampinup.net, and click on the "shop now" tab, or click on the 2015-16 Catalog right here on my blog.  

I hold adult classes each month.  If you live near my home at 555 Williamsdale Road, Graham, NC 27253 and would like to attend any of my classes, please let me know.  For details, see my class schedule right here on my blog, or on my SU website found Here.

God is in control, He is able to do more than you can ask or imagine.  Ephesians 3:20 

Thank you for stopping by, and have a great day,

~Linda
Built for Free Using: My Stampin Blog

Friday, September 18, 2015

Happy Scenes, Hearth & Home Thinlits Dies and Christmas Card with a Belly-band


I received a card very similar to this one at Convention three years ago, and I have a video to show you how easy it is to make this WOW card. You can view it on YouTube by clicking Here.  I used some of the new products from SU's Holiday Mini--Happy Scenes stamp set, and the Hearth & Home Thinlits Dies, plus more from the big catalog.

I also wanted to give you the dimensions of each piece of card stock:  
Base of Smoky Slate is 7 x 4.25, scored at 1.5 on the long side. 
Next layer of Real Red is 5.25 x 4  
DSP layer is 5 x 3.75  
Real Red layer for flap is 4 x 1.50 and you will need 2 of these
DSP layer for flap is 3.75 x 1 and you will need 2 of these
Real Red card stock for the card front is 11 x 3 scored at 3 5/8 x 7 3/8
Whisper White card stock for inside of the card front is 3 3/8 x 2.75 x 2 each and one piece of DSP that is 3 3/8 x 2.75
Real Red card stock for belly band is  ¾ x about 11, and DSP ½ x about 11
Bow:  Real Red card stock 7 ¼ x 1

If you would like to place an order, head on over to my Stampin' Up! website,  www.lindafisher.stampinup.net, and click on the "shop now" tab, or click on the 2015-16 Catalog right here on my blog.  

I hold adult classes each month.  If you live near my home at 555 Williamsdale Road, Graham, NC 27253 and would like to attend any of my classes, please let me know.  For details, see my class schedule right here on my blog, or on my SU website found Here.

God is in control, He is able to do more than you can ask or imagine.  Ephesians 3:20 

Thank you for stopping by, and have a great day,

~Linda
Built for Free Using: My Stampin Blog

Wednesday, September 16, 2015

Weekly Deals, September 15 to 21, 2015

Stampin' Up! has some new Weekly Deals, and that means a new set of six products at a great discount of 25% off the catalog price. Take a look-see, and if you like to place an order, head on over to my Stampin' Up! website  www.lindafisher.stampinup.net, and click on the "shop now" tab, or click on the 2015-16 Catalog right here on my blog.  


I hold adult classes each month.  If you live near my home at 555 Williamsdale Road, Graham, NC 27253 and would like to attend any of my classes, please let me know.  For details, see my class schedule right here on my blog, or on my SU website found Here.

God is in control, He is able to do more than you can ask or imagine.  Ephesians 3:20 

Thank you for stopping by, and have a great day,

~Linda

Tuesday, September 15, 2015

Watercolor Wash, Serene Silhouettes and Choose Happiness

I get together and make cards with a fantastic group of other demonstrators, and our challenge this time was to make a card using SU's new corrugated paper (page 148).

I used Watercolor Wash, one of the new background stamps in the 2015-16 Catalog from SU, along with Serene Silhouettes and Choose Happiness.  I wish I had stamped-off  with the background stamp, though I do like the over-all results.  The idea for this card came from my friend, Retha Fulp.  I am very fortunate because she freely shares her time, talent, and designs with me. Thank you Retha, you're the best.

If you would like to place an order, head on over to my Stampin' Up! website,  www.lindafisher.stampinup.net, and click on the "shop now" tab, or click on the 2015-16 Catalog right here on my blog.  

I hold adult classes each month.  If you live near my home at 555 Williamsdale Road, Graham, NC 27253 and would like to attend any of my classes, please let me know.  For details, see my class schedule right here on my blog, or on my SU website found Here.

God is in control, He is able to do more than you can ask or imagine.  Ephesians 3:20 

Thank you for stopping by, and have a great day,

~Linda
Built for Free Using: My Stampin Blog

Sunday, September 13, 2015

Haunt Ya Later, Gorgeous Grunge and Sheltering Tree for Halloween

While browsing thru my new 2015-16 Holiday Mini, for the umpteenth time, I noticed this card on the bottom of page 48, and decided to CASE it.  Somehow smudges of ink appeared where I didn't want, and I covered them with a stamp from Gorgeous Grunge, clever, huh?   I used three stamp sets for this card.  Haunt Ya Later, Gorgeous Grunge, and Sheltering Tree.  I had so much fun making this one, and I'm not even a Halloween "kind of gal"!!

If you would like to place an order, head on over to my Stampin' Up! website,  www.lindafisher.stampinup.net, and click on the "shop now" tab, or click on the 2015-16 Catalog right here on my blog.  

I hold adult classes each month.  If you live near my home at 555 Williamsdale Road, Graham, NC 27253 and would like to attend any of my classes, please let me know.  For details, see my class schedule right here on my blog, or on my SU website found Here.

God is in control, He is able to do more than you can ask or imagine.  Ephesians 3:20 

Thank you for stopping by, and have a great day,

~Linda
Built for Free Using: My Stampin Blog

Thursday, September 10, 2015

Happy Scenes and Hearth & Home Framelit Dies

I used the Happy Scenes stamp set and the Hearth & Home Framelits dies to make this lovely card.  You can find both on page 11 of the Holiday Mini.   I also used my new favorite designer series paper, Into the Woods.  It coordinates with at least eight colors of SU cardstock, and more colors than that if you are super creative.  

Here is how I made the scene behind the window frame: 
  1. I sponged some Pumpkin Pie and Daffodil Delight ink to make a sunset, 
  2. I stamped the tree/pumpkin scene with Early Espresso.  
  3. I colored my pumpkins with a Pumpkin Pie Marker.  
  4. I used a stamp from Sheltering Tree and Smoky Slate ink to make the ground appear "fallish".   
  5. I glued the scene to the back of the frame with snail, and popped it up with dimensionals.  
  6. The little acorns are from a retired set, Wonderfall.  
  7. I used a glue dot to adhere the Early Espresso bakers twine to the acorns. 

If you would like to place an order, head on over to my Stampin' Up! website,  www.lindafisher.stampinup.net, and click on the "shop now" tab, or click on the 2015-16 Catalog right here on my blog.  

I hold adult classes each month.  If you live near my home at 555 Williamsdale Road, Graham, NC 27253 and would like to attend any of my classes, please let me know.  For details, see my class schedule right here on my blog, or on my SU website found Here.

Prayer works, apply generously to all circumstances.  James 4:7 

Thank you for stopping by, and have a great day,

~Linda
Built for Free Using: My Stampin Blog

Monday, September 7, 2015

Home for Christmas and Hearth & Home Screen card

My labor of love card was made by cutting scenes from the Home for Christmas designer series paper (dsp).  You can find this paper on page 9 in the 2015-16 Holiday Mini from Stampin' Up!   

  • I used a piece of 5 1/2" x 12" Real Red card stock, and scored it at 3", 6" and 9".  
  • I centered my Decorative Label punch between each score line and punched the "legs".  
  • I punched the stars with my Confetti Stars punch in between each score line.
  • The windows were made with the Hearth & Home thinlit dies.
  • I hand cut each scene from the dsp and glued it behind each window.  
  • Labor of Love-for sure!!!!!   

If you would like to place an order, head on over to my Stampin' Up! website,  www.lindafisher.stampinup.net, and click on the "shop now" tab, or click on the 2015-16 Catalog right here on my blog.  

I hold adult classes each month.  If you live near my home at 555 Williamsdale Road, Graham, NC 27253 and would like to attend any of my classes, please let me know.  For details, see my class schedule right here on my blog, or on my SU website found Here.

Let love and faithfulness never leave you; bind them around your neck, write them on the tablet of your heart.  Proverbs 3:3

Thank you for stopping by, and have a great day,

~Linda
Built for Free Using: My Stampin Blog

Saturday, September 5, 2015

Hearth & Home and Greetings Thinlits Dies

The Hearth & Home framelits dies are new in our 2015-16 Holiday Mini, and they are just so much fun to use and play with.  

I subscribe to a lot of blogs, and when I received Mercedes Weber's email showcasing her Hearth & Home Window Framelits, I knew I wanted to make one of these cards too.  You can see her card Here, post of August 27, 2015.  I used one of my favorite stamps, Hardwood, and I think it gives my card a little extra dimension.  This card was so enjoyable to make, and given more time, well, you know......

If you would like to place an order, head on over to my Stampin' Up! website,  www.lindafisher.stampinup.net, and click on the "shop now" tab, or click on the 2015-16 Catalog right here on my blog.  

I hold adult classes each month.  If you live near my home at 555 Williamsdale Road, Graham, NC 27253 and would like to attend any of my classes, please let me know.  For details, see my class schedule right here on my blog, or on my SU website found Here.

Do not pray for tasks equal to your powers; pray for powers equal to your tasks.  Phillip Brooks 

Thank you for stopping by, and have a great day,

~Linda
Built for Free Using: My Stampin Blog

Thursday, September 3, 2015

Howl-o-ween Treat

When I saw the Howl-o-ween Treat stamp set on page 49 of the Holiday Mini, I knew I had to have it, if for no other reason, than this darling little owl, and I'm not a big fan of Halloween, how about that!!!  I have titled her the "cutest owl on the block". Of course, after I added the wiggle eyes, she was even more worthy of her name.  

I thought she looked best as a shiny owl, so I heat embossed both the owl and her hat with black embossing powder.  The Boo!, owl, and hat were cut out using the coordinating framleits, Boo to You Framelits Dies, also on page 49 of the Holiday Mini.  

This is one of the cards I am offering at my September 8th, 10th and 12th, 2015 classes, and I am so excited to share.

If you would like to place an order, head on over to my Stampin' Up! website,  www.lindafisher.stampinup.net, and click on the "shop now" tab, or click on the 2015-16 Catalog right here on my blog.  

I hold adult classes each month.  If you live near my home at 555 Williamsdale Road, Graham, NC 27253 and would like to attend any of my classes, please let me know.  For details, see my class schedule right here on my blog, or on my SU website found Here.

No matter how difficult the way, He promises to hold us steady.  --Author Unknown 

Thank you for stopping by, and have a great day,

~Linda
Built for Free Using: My Stampin Blog

Wednesday, September 2, 2015

Flower Patch, And Many More and Sprinkles on Top

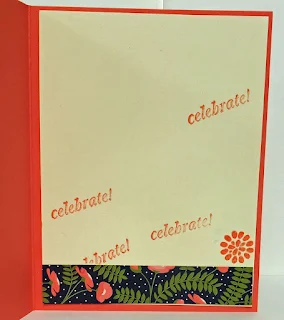
There are so many ways to use the Flower Patch stamp set, and I think, with more time, I would have made other cards using different color combinations with the Pretty Petals DSP pack.  This is one of the cards I am offering at my September 8th, 10th and 12th, 2015 classes.  I'm excited to share.

I saw this layout on Jan Tinklenberg's blog, post of August 13, 2015.  You can see her card by clicking Here.

If you would like to place an order, head on over to my Stampin' Up! website,  www.lindafisher.stampinup.net, and click on the "shop now" tab, or click on the 2015-16 Catalog right here on my blog.  

I hold adult classes each month.  If you live near my home at 555 Williamsdale Road, Graham, NC 27253 and would like to attend any of my classes, please let me know.  For details, see my class schedule right here on my blog, or on my SU website found Here.

Being deeply loved by someone gives you strength, while loving someone deeply gives you courage.  Lao Tzu

Thank you for stopping by, and have a great day,

~Linda
Built for Free Using: My Stampin Blog